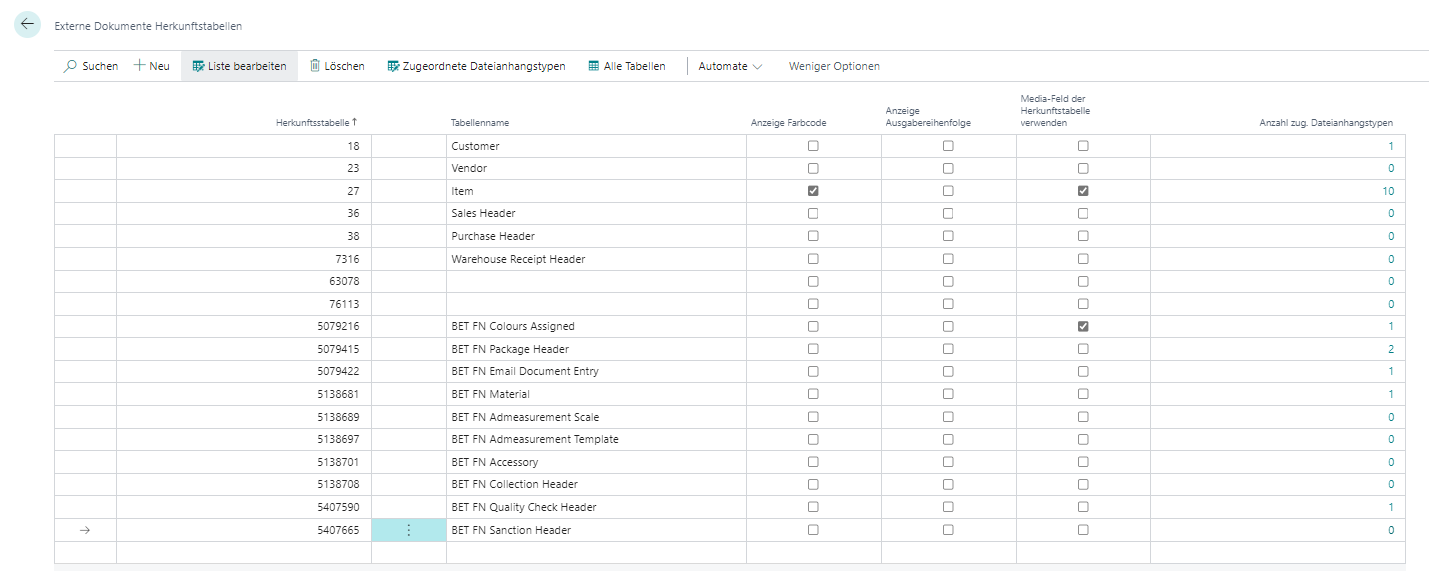
If it is to be possible to store external documents for a table, a setup for this table must be made in the "External Documents Setup". Here is an overview of the external documents, origin tables and the attachment types to be ordered accordingly.
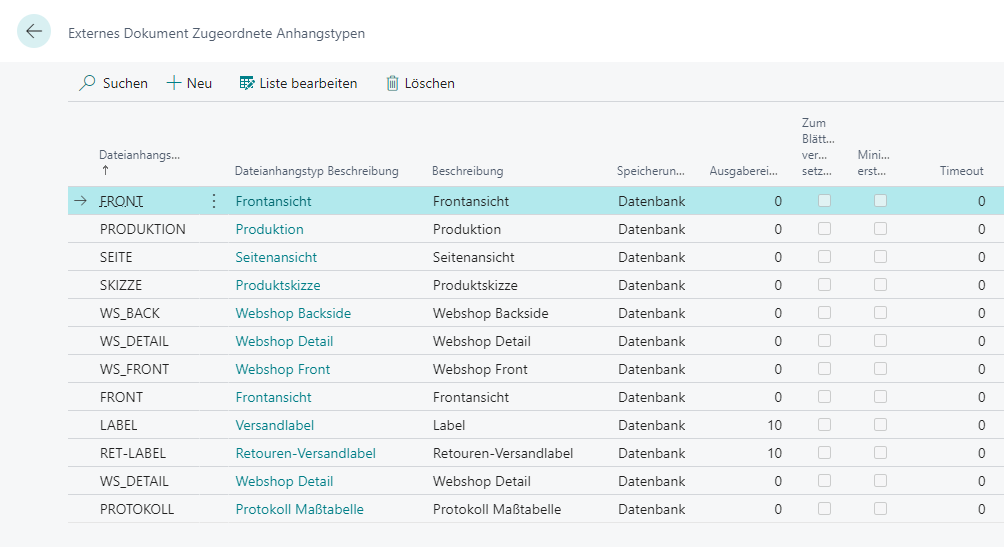
Several attachment types can be assigned to each table. This allows the attachments to be categorized. The attachment type also defines how and where the attachment is to be stored.
By selecting the origin table in the upper area, the corresponding attachment types are displayed in the lower area.
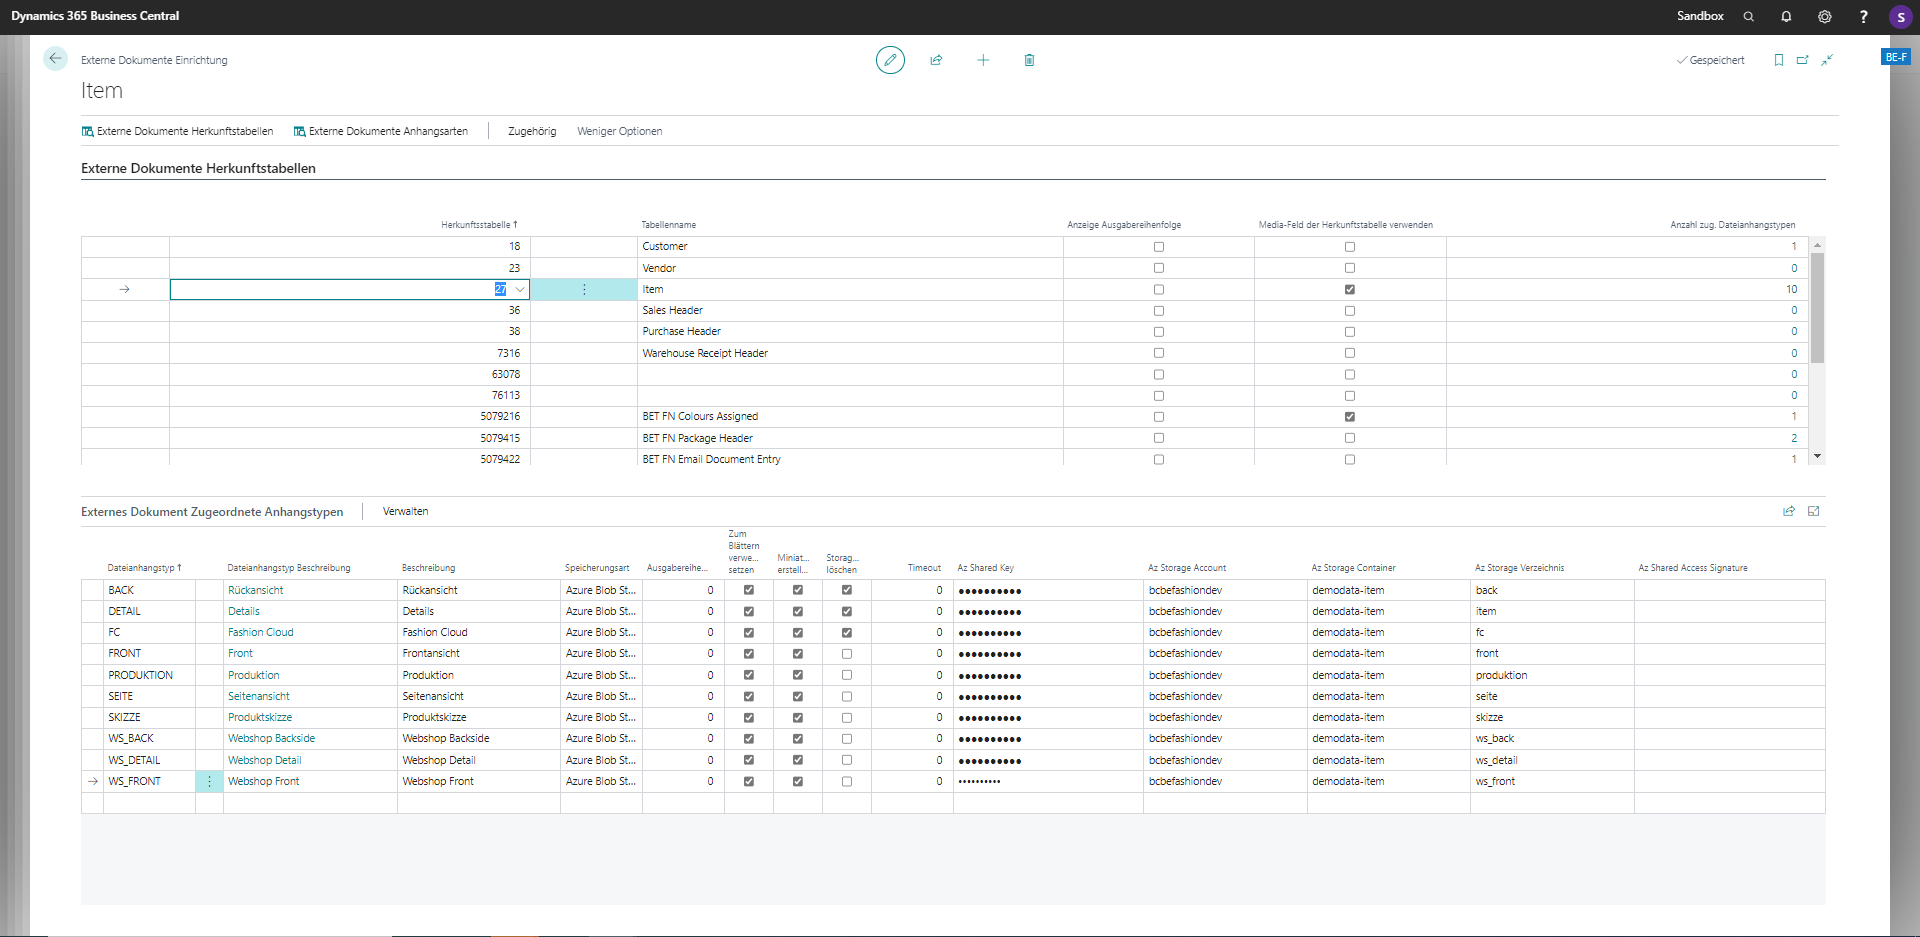
The list lists all the origin tables in which external documents are to be used.
All available tables can be viewed via the "All tables" call.
| Field | Description |
|---|---|
| Table of origin | Number of the table |
| Table | Table name |
| Display of dispensing sequence | Checked if the display is to be made based on the stored output order in the attachment types. |
| Use the media field of the origin table | Checked if the media field is to be used on the original table. When validating the Default Image attribute, the MediaSet is synchronized in the origin table. This means that this image from the "External Documents" is available in all brick views, as they always use the media field on the original table as a source for display. |
| Number of trains. File attachment types | The number of associated file attachment types is displayed summed up. |
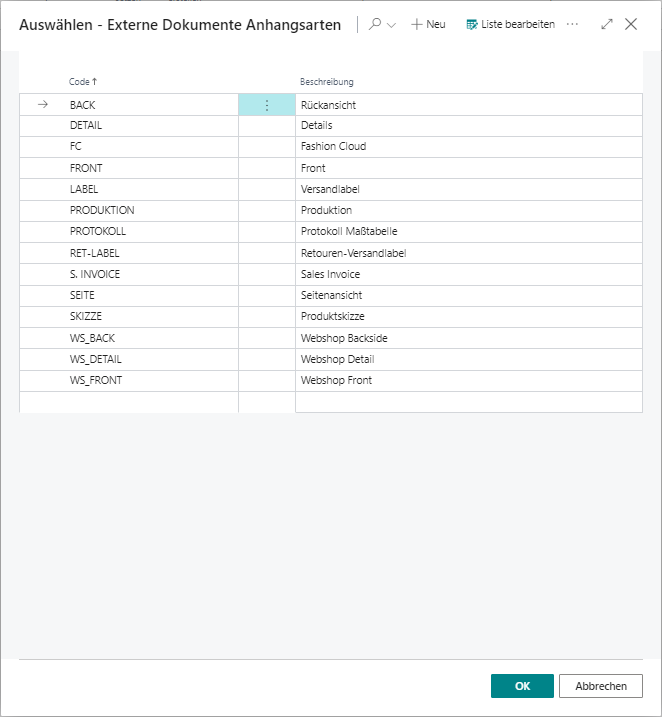
Manage categories for file attachments
| Field | Description |
|---|---|
| File attachment type | Attachment type code |
| File Attachment Type Description | Description of the attachment type |
| Description | Additional description if necessary |
| Type of storage | Choose from database, URL, or Azure blob storage |
| Issue sequence | Possibility to specify the order of output within several categories, for example, if several documents are assigned to an article. |
| Set to Use for Scrolling | Used to be able to scroll between several images of an article. |
| Create a thumbnail | Checked if you want the image to be automatically minimized to thumbnail size to save disk space. |
| Timeout | If an external document is referenced via http, then a thumbnail can also be created. To do this, an http request is executed to cache the file. "Timeout" can be used to specify the waiting time of the http request in milliseconds. |
| Az Shared Key | For Azure Blob Storage storage type: Specifies the Azure Blob Storage shared key used to authenticate. Authentication via shared key or SAS is possible. |
| Az Storage Account | For Azure Blob Storage storage type: Specifies the storage account in which the external documents are stored. |
| Az Storage Container | For Azure Blob Storage storage type: Specifies the storage container in which the external documents are stored. |
| Az Storage Directory | For Azure Blob Storage storage type: Optionally, specifies the folder structure in which the blobs are to be stored. |
| Az Storage Access Signature | For Azure Blob Storage storage type: Specifies the shared access signature (SAS) used to authenticate. Authentication via shared key or SAS is possible. |
Categories for File Attachments (External Documents, Attachment Types)
The external documents are opened via the "External documents" function on the article or model.

The functions New, Import, Open, Delete and Take Picture are explained below.
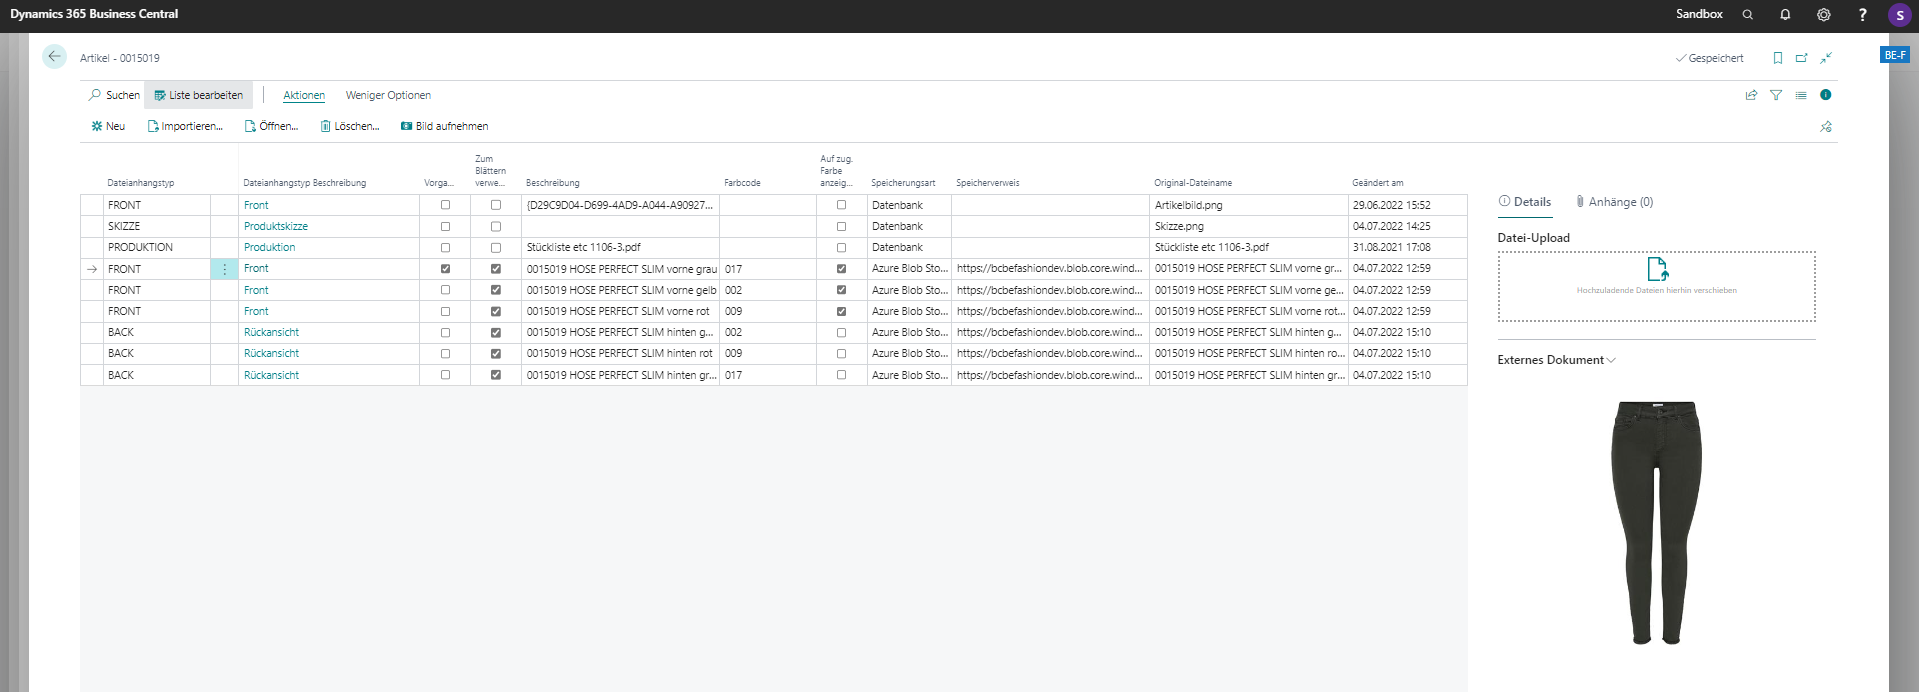
New lines of file attachment types are created for e.g. an article. The file attachment type is selected from the list and then added to the list of external documents. The description must be entered as well as the other fields according to the external document Assigned attachment types.
The "Import" function is used to import a new document based on the stored settings for the table. The stored path is called. The file can be renamed if you do not want to save it under the original name.
The file attachment type can then be specified.
In addition, the "Default image" check mark can be set if the image is to be displayed in the factbox on the article and model, and should appear as a thumbnail in the tile view.
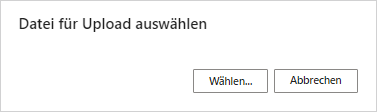
On the right side, in the Details section, there is the option to upload files via drag and drop.
After the file has been moved into the dotted frame, the following dialog box opens.
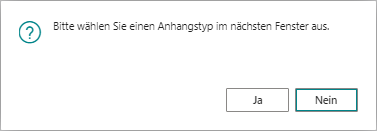
The next step is to select the attachment type.
The function deletes the file and the record.
The function activates the camera and an image can be created and stored.